Documentation
This guide explains how to add a new page to the documentation site.
GitHub Repository Link
1.1 Adding new page
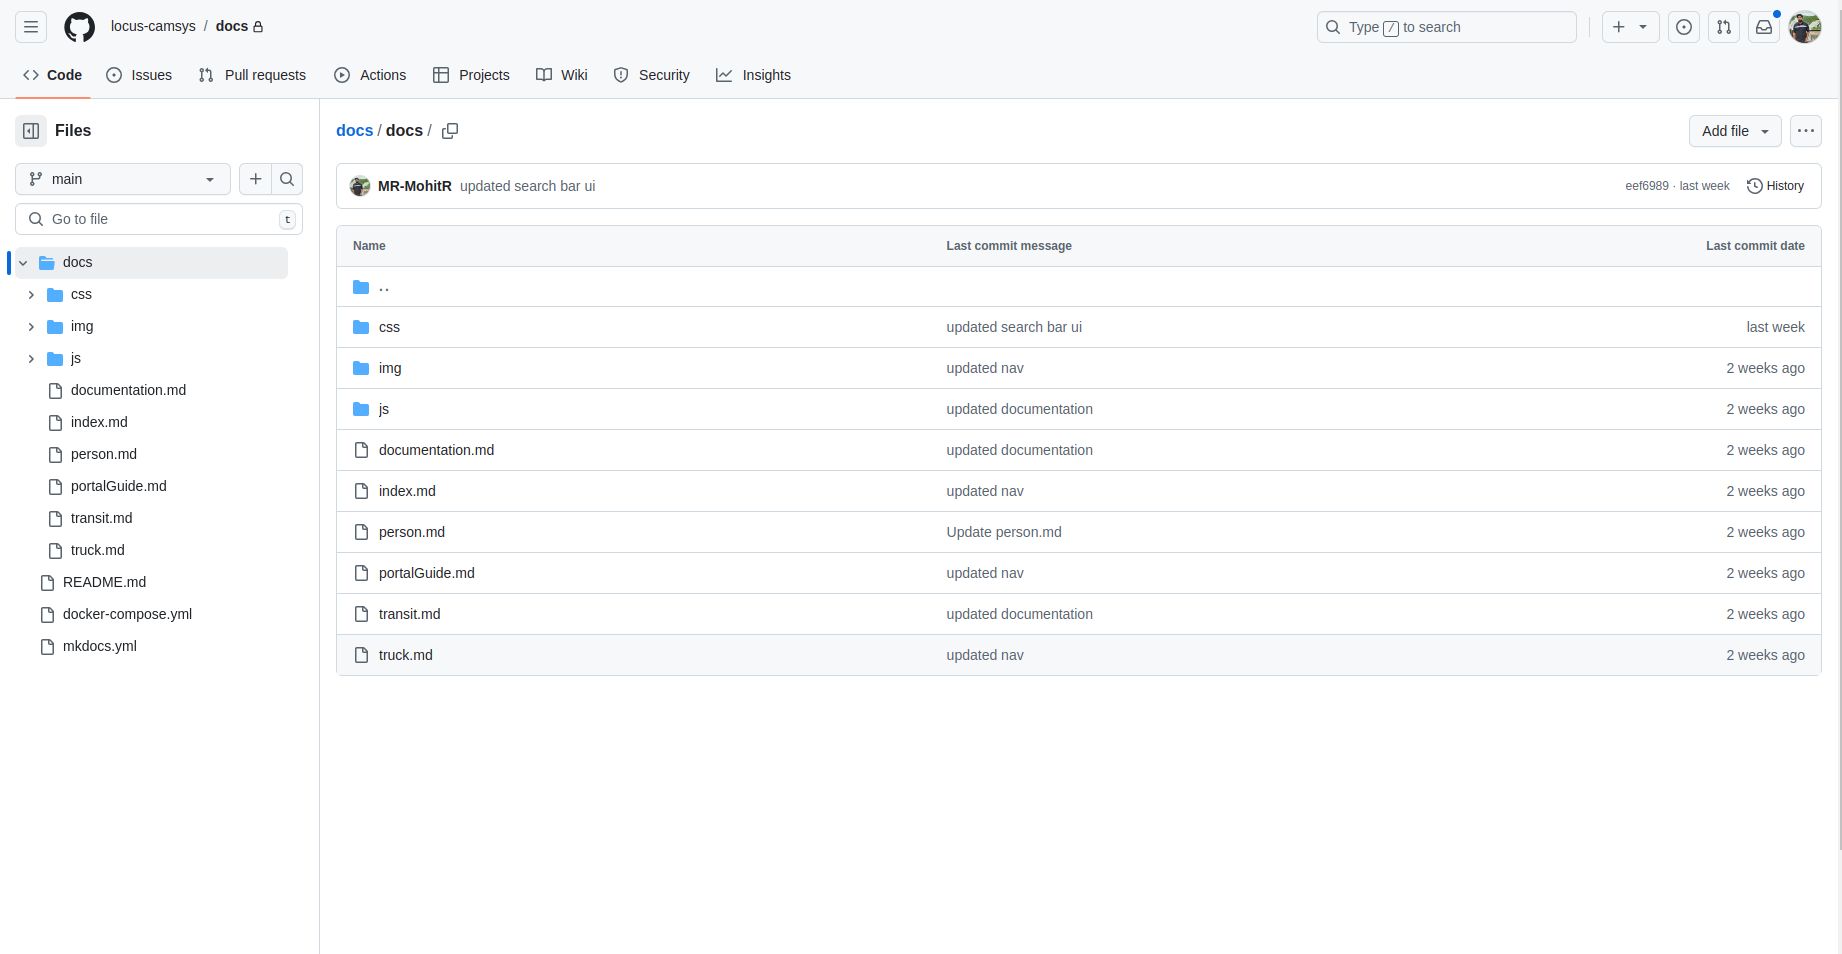
File Structure
docs:
  - css  # CSS files
  - js   # JavaScript files
  - img  # Image files
  - portalGuide.md
  - person.md
Steps to Add a New Page
Step 1: Create a Markdown File
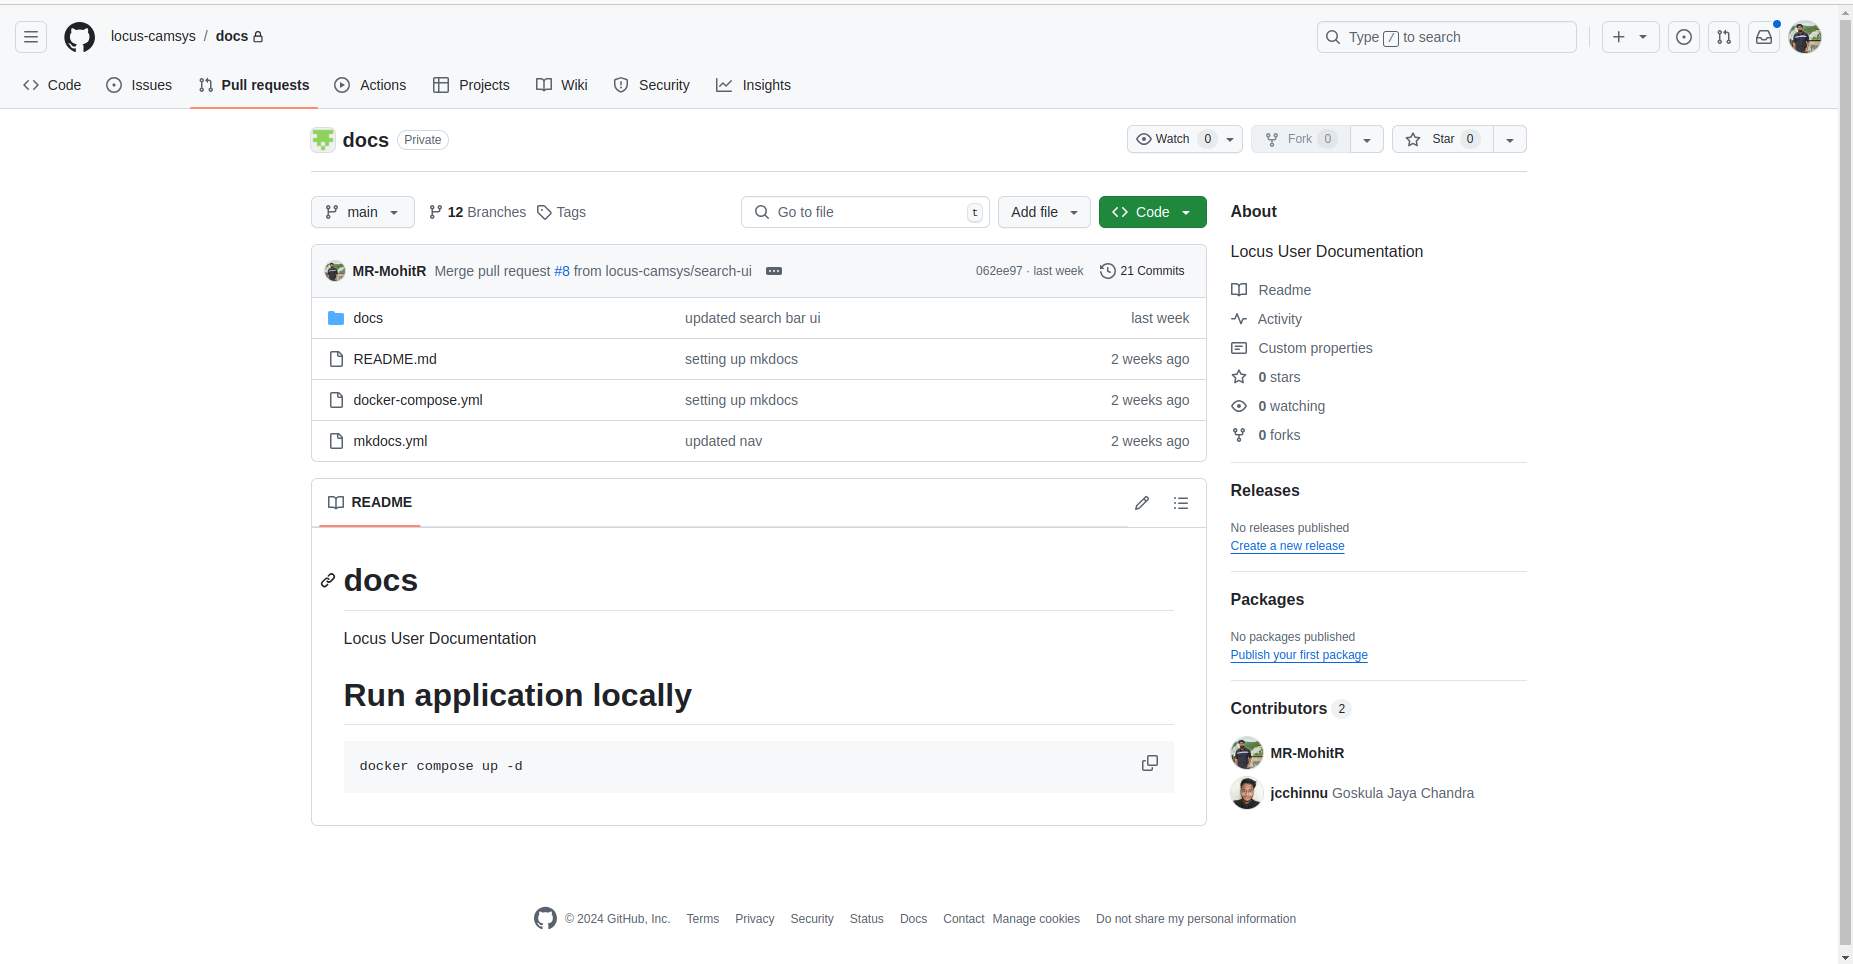
- Navigate to the docs folder in the github repository Docs GitHub Repository.
2. Create a new file in .md format (Markdown) for your page content.
Step 2: Add Your New Page to the Navigation
- Open the mkdocs.yaml file, located in the root of the repository.
2. Under the nav (navigation) section, add a reference to your new .md file to ensure it appears in the navigation sidebar.
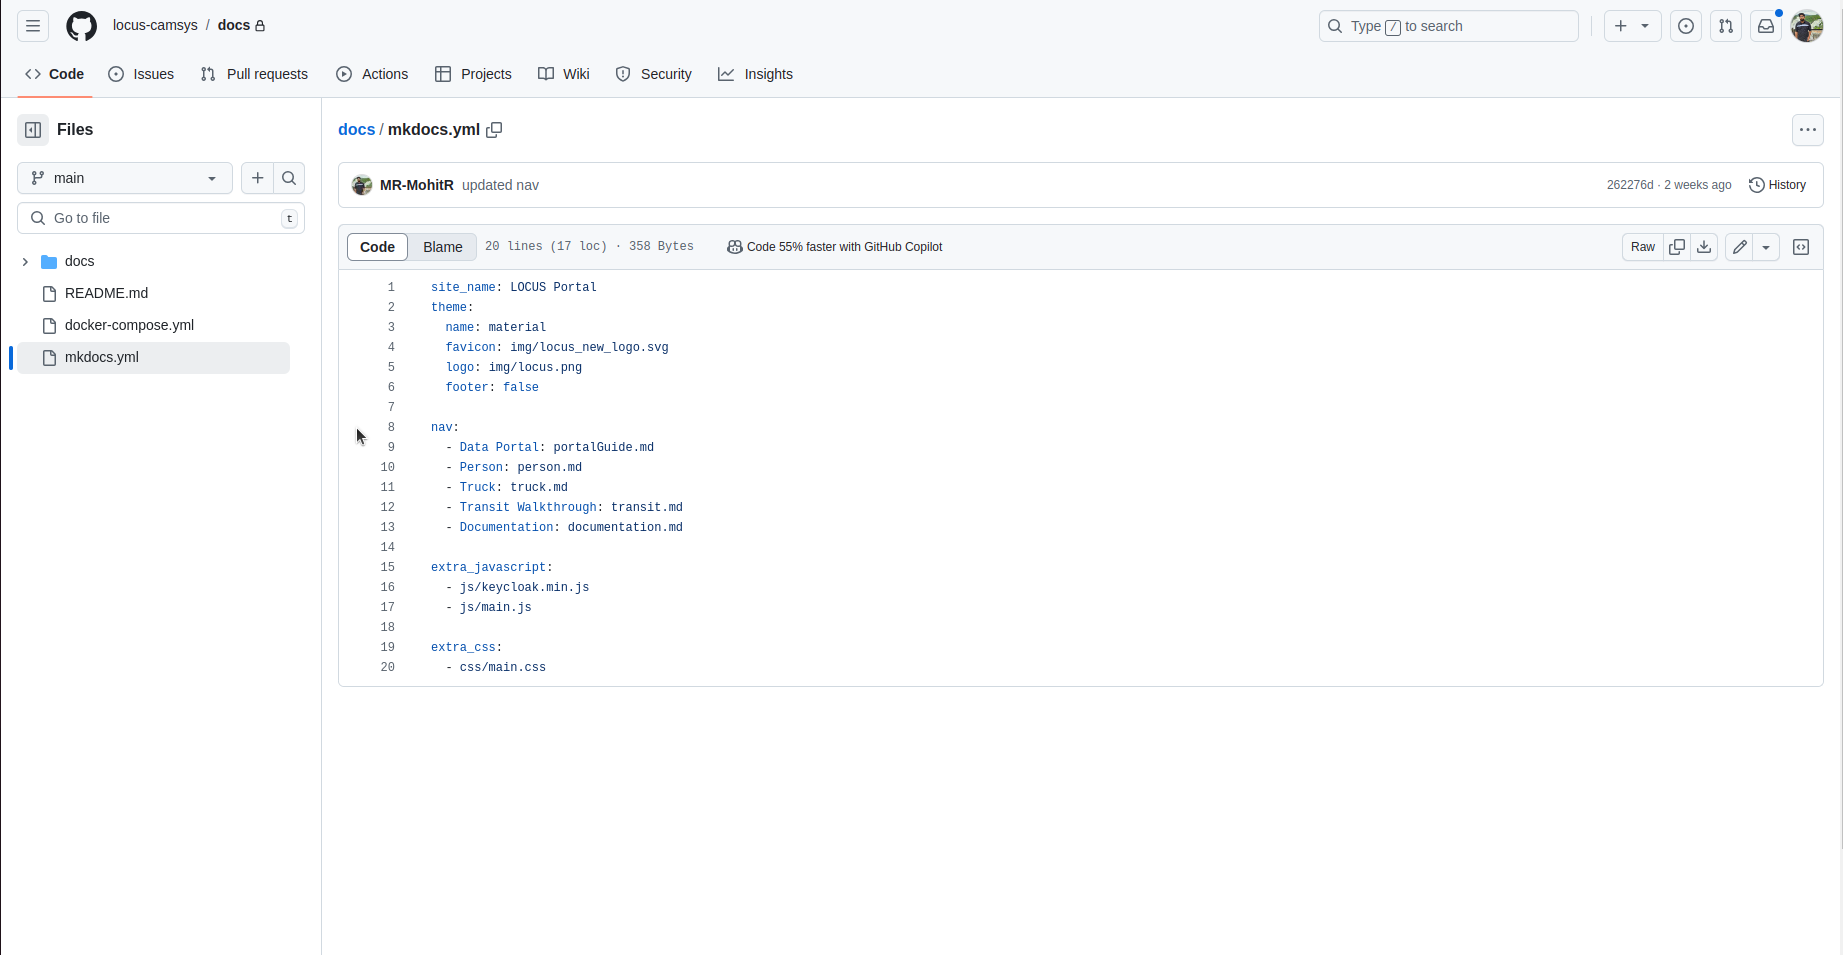
Example:
nav:
  - Data Portal: portalGuide.md
  - Person: person.md
  - Truck: truck.md
  - Transit Walkthrough: transit.md
  - Documentation: documentation.md
  - Example: example.md # New page added here
Step 3: Write Content in Markdown Format
- Open your .md file.
- Write the page content using Markdown syntax, ensuring consistency with the structure of other pages.
Reference: To edit the file, refer to Editing an Existing Markdown File section.
Example Format for a Documentation Page:
# Data Portal
## 1. Home
The home page is contains a high-level table of all projects owned by and shared with you.
### *1.1 Navigation*
i. View all projects you have access to.
<br/>
ii. Use the  toggle to switch between Projects and Views.
<br/>
iii. Use the  toggle to switch between list view and thumbnail view
<br/>
iv. Use the  toggle to switch between all projects, projects created by you, and projects shared with you
<br />
v. Use the  button to sort rows in the list in ascending or descending order
### *1.2 Common Actions*
Click the  button to view common actions that you can execute. Options include:
- **`Share`**: Use the dropdowns to search for users to provide dashboard access to. Assign “Viewer” or “Editor” roles.
- **`Favorite`**: Favorite a project/view for easy access in the future
- **`Delete`**: Delete a project/view so that it no longer appears in your list
1.2 Adding Images to Your Page
To include an image in your Markdown file:
- Save your image file in the img folder under docs/.
docs:
  - css
    - spreadsheet files
  - js
    - javascript files
  - img
    - images
  - portalGuide.md
  - person.md
2. Reference the image in Markdown using the following format:

Example:
Use the  toggle to switch between Projects and Views.
For more details on Markdown syntax, see the Markdown guide.
1.3 Editing an Existing Markdown File
To edit an existing .md file:
- Go to the Docs GitHub Repository.
2. Enter the docs folder.
3. Select the file you want to edit (e.g., person.md).
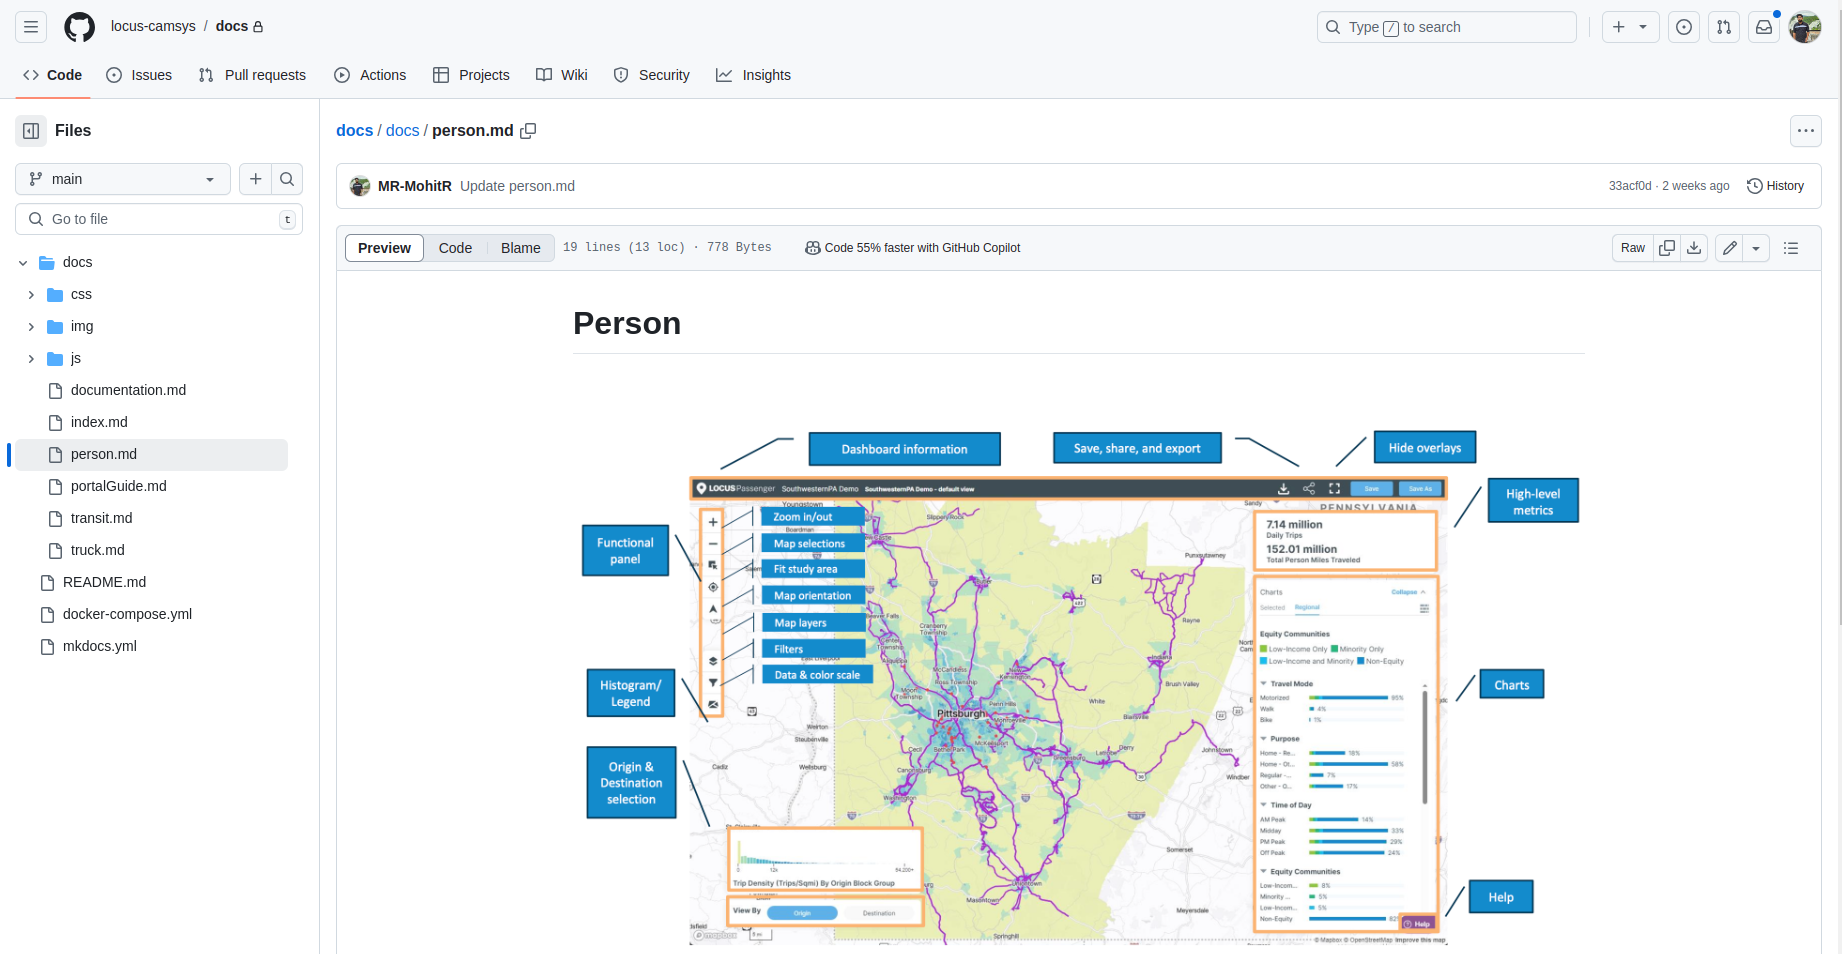
4. Click on the edit icon to open the file in edit mode.
![]()
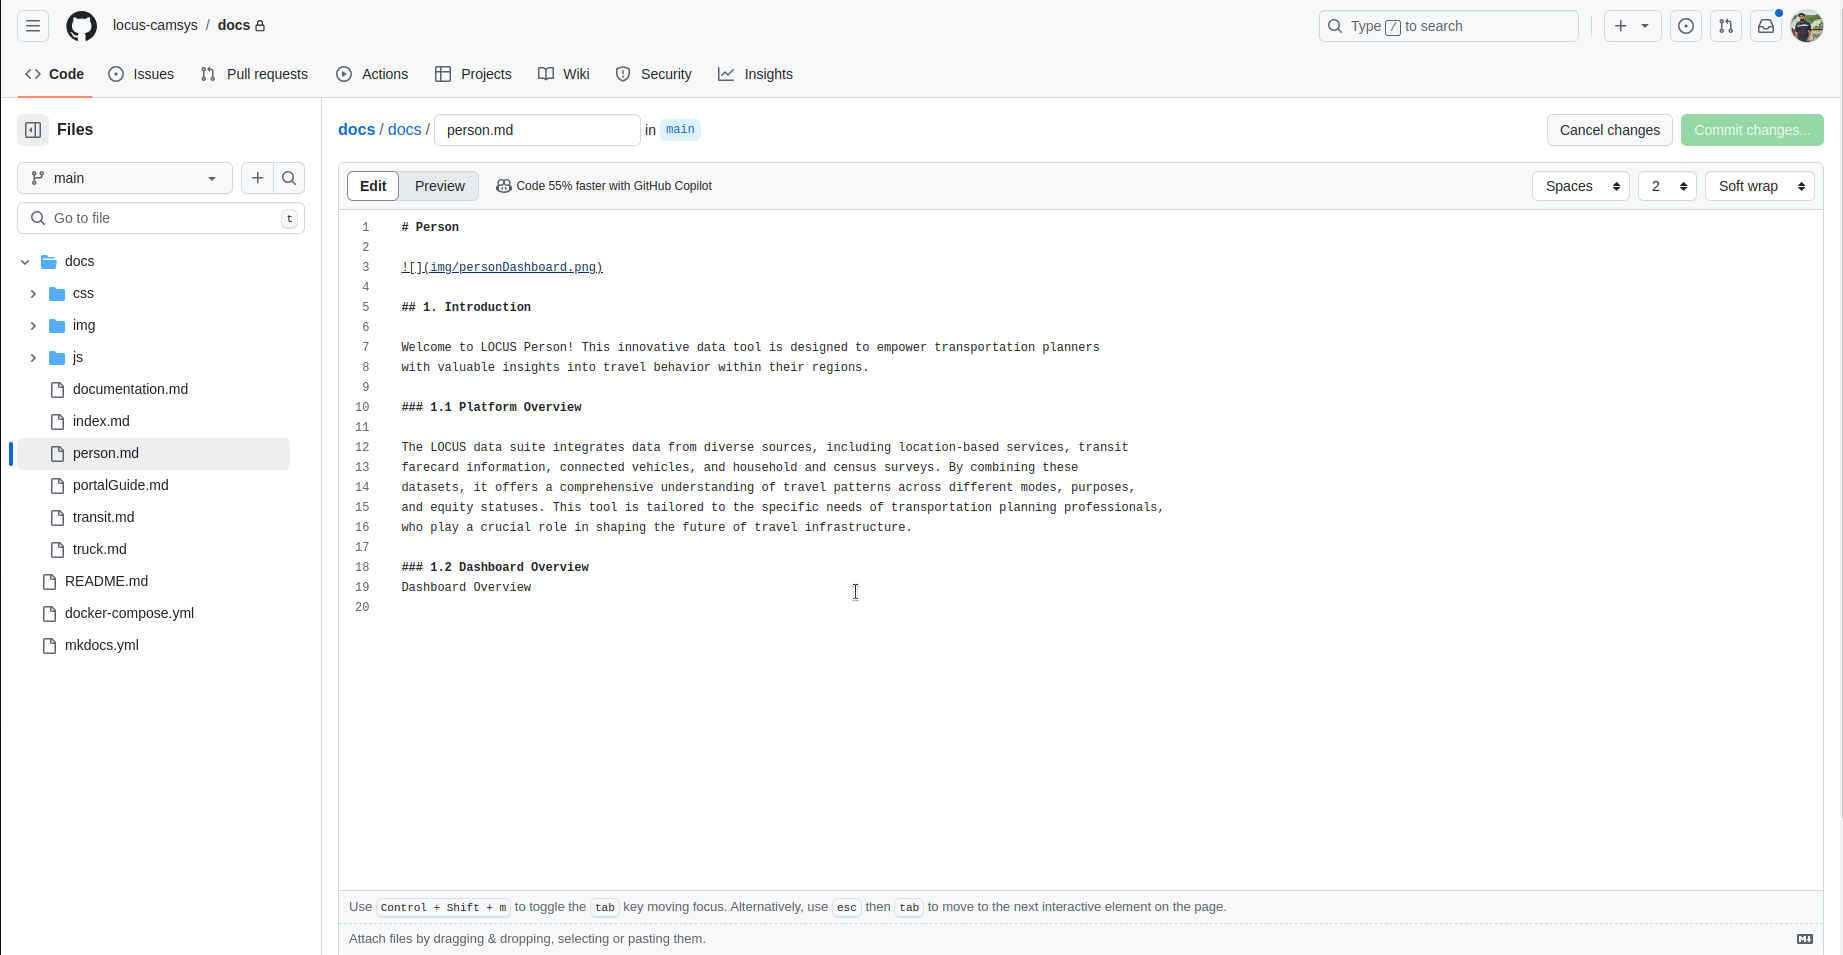
5. Make your changes, using the Edit and Preview views to see your content before saving.
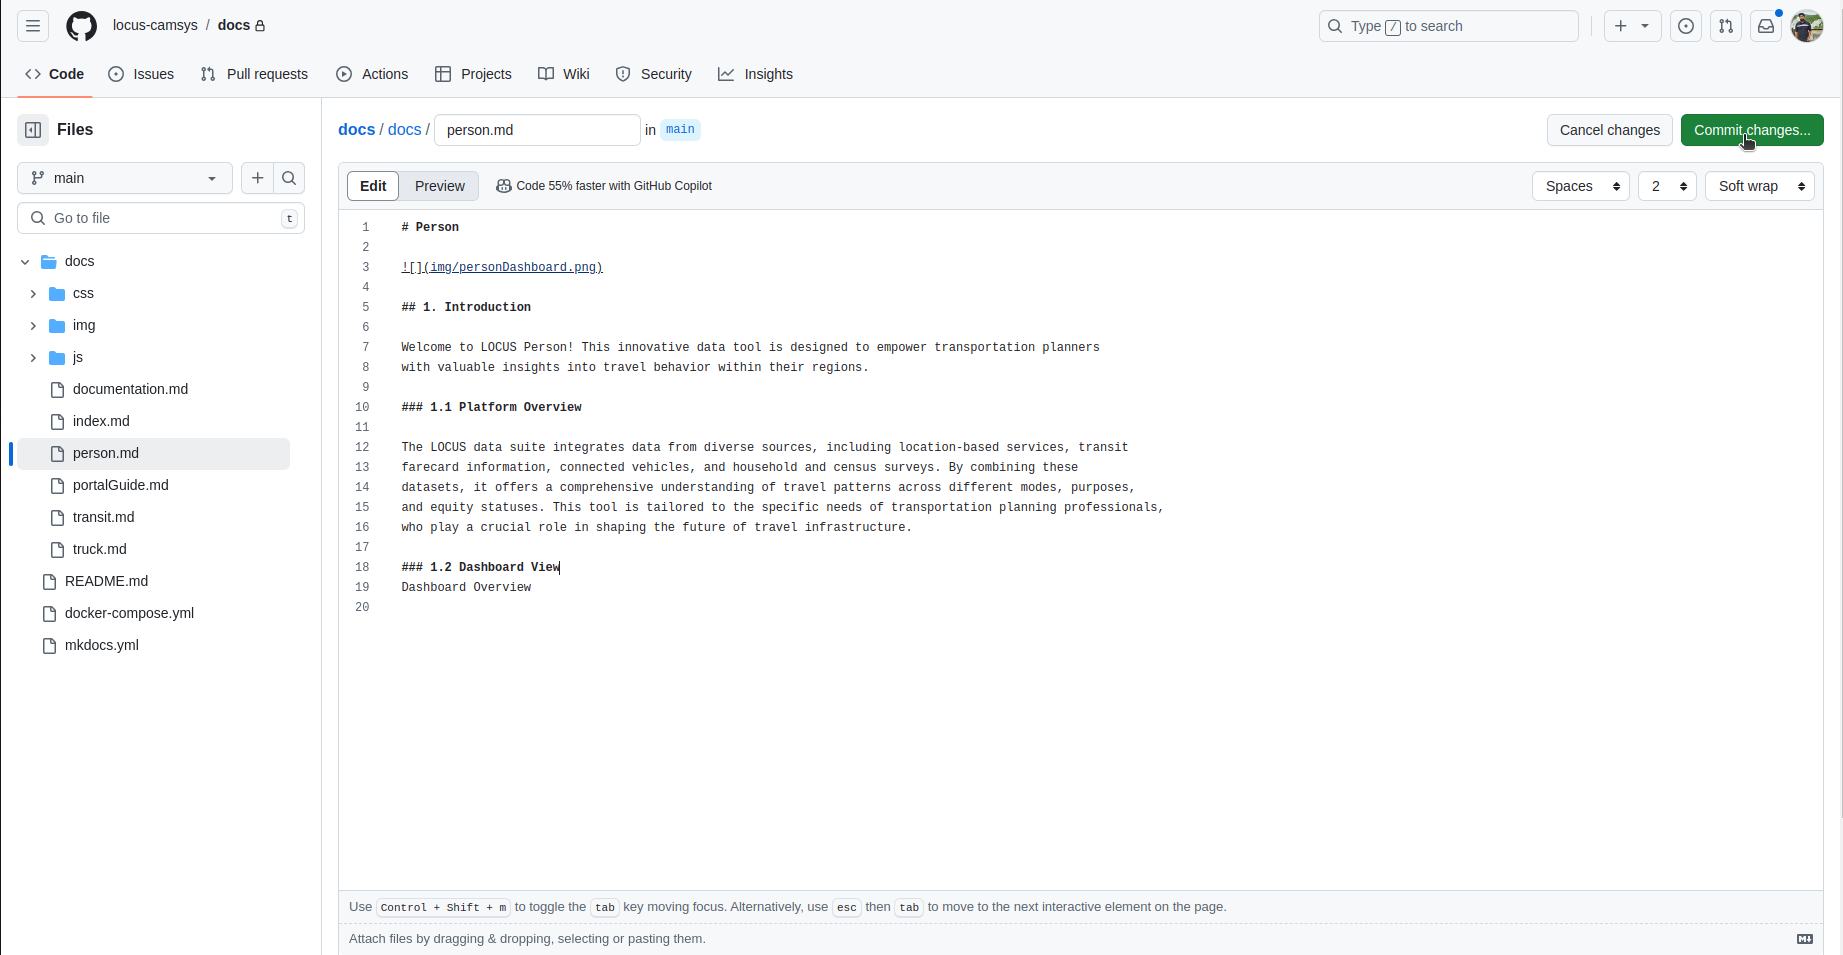
6. When finished, click Commit changes to create a pull request.
Example:
Your page will now be added and tracked under the documentation.
Submitting a Pull Request
Once you’ve made and committed your changes, you can raise a pull request (PR) for review and approval. Follow these steps:
- After clicking Commit changes, a pop-up will confirm your changes and prompt you to create a pull request.
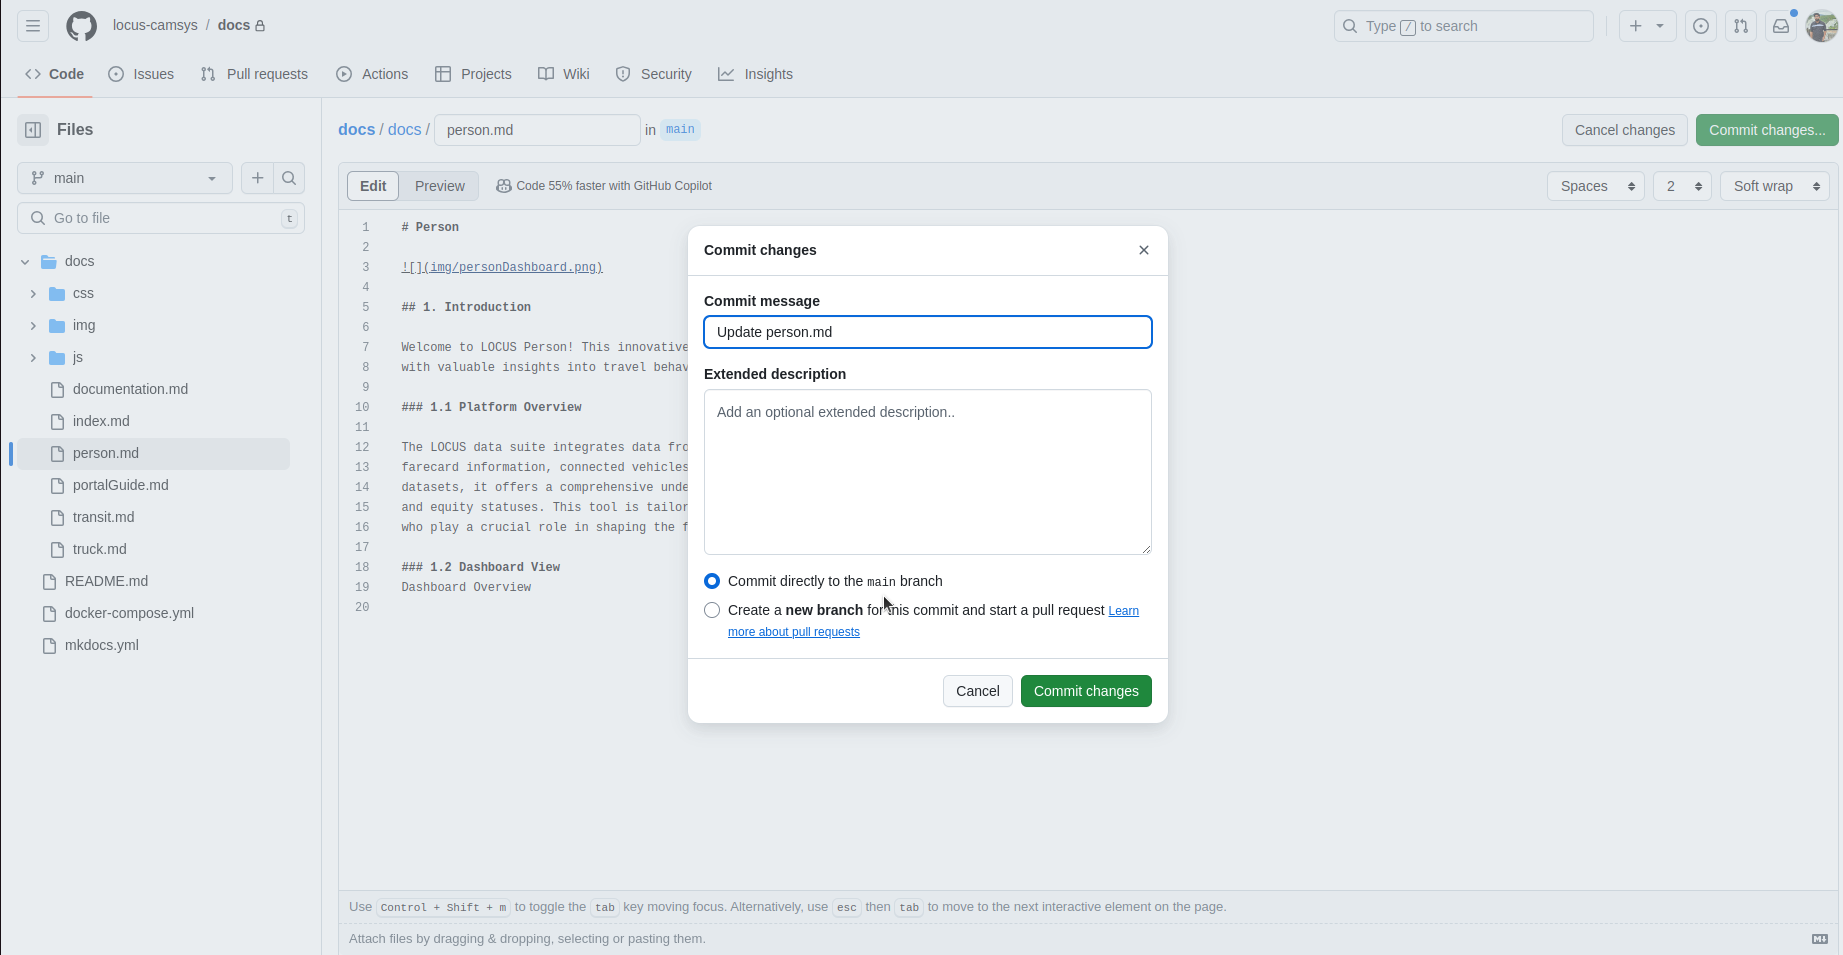
2. Optionally, modify the commit message to clarify your changes, then select Create a new branch for the PR. You can also customize the default branch name if needed.
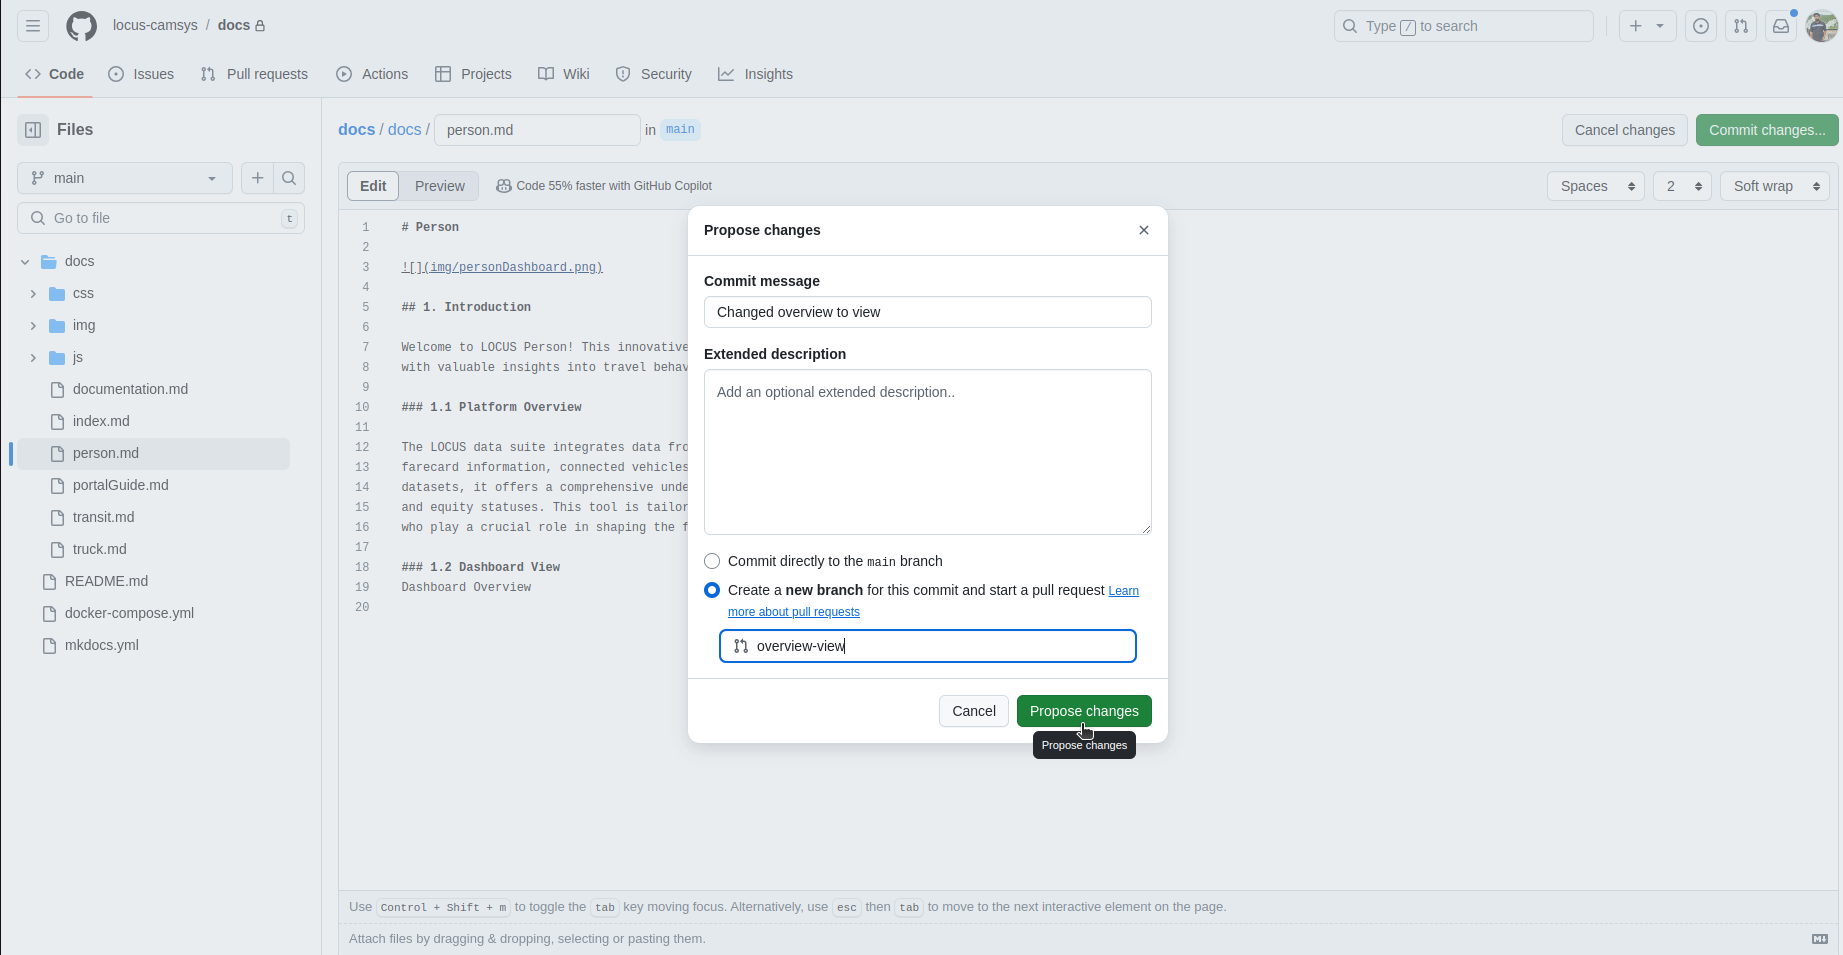
3. Click Propose changes to continue.
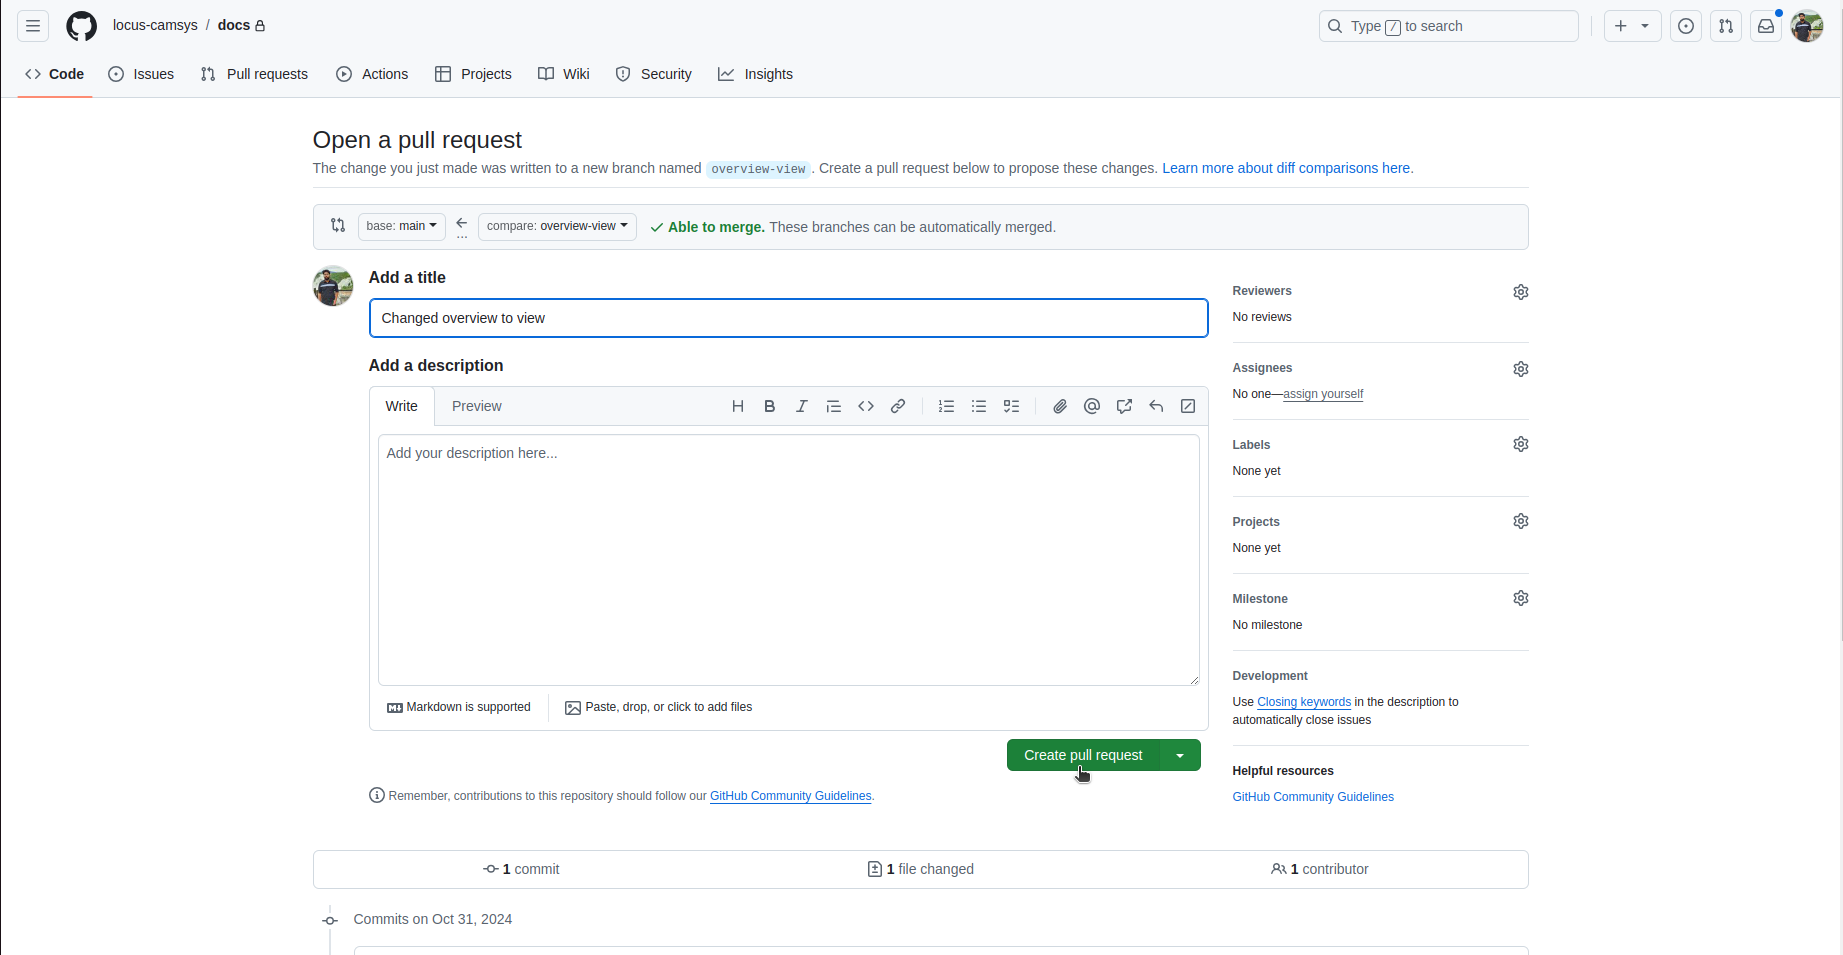
4. You'll be redirected to the Open a pull request page, where you can review the changes. Add a clear description summarizing your updates, then click Create pull request.
5. Note: This pull request requires approval from other contributors before it can be merged into the main branch. Contributors will review your changes and either approve or suggest edits.
6. Once approved, your changes will be merged into the main branch by an authorized contributor, completing the update process.
This process ensures that all updates are reviewed for quality and consistency across the documentation.
1.4 Manage the Pull Request
To review, approve, and manage raised pull requests:
- Open the Repository: Go to the Docs GitHub Repository.
2. Navigate to Pull Requests: Click on the Pull requests tab to view all active and past PRs.
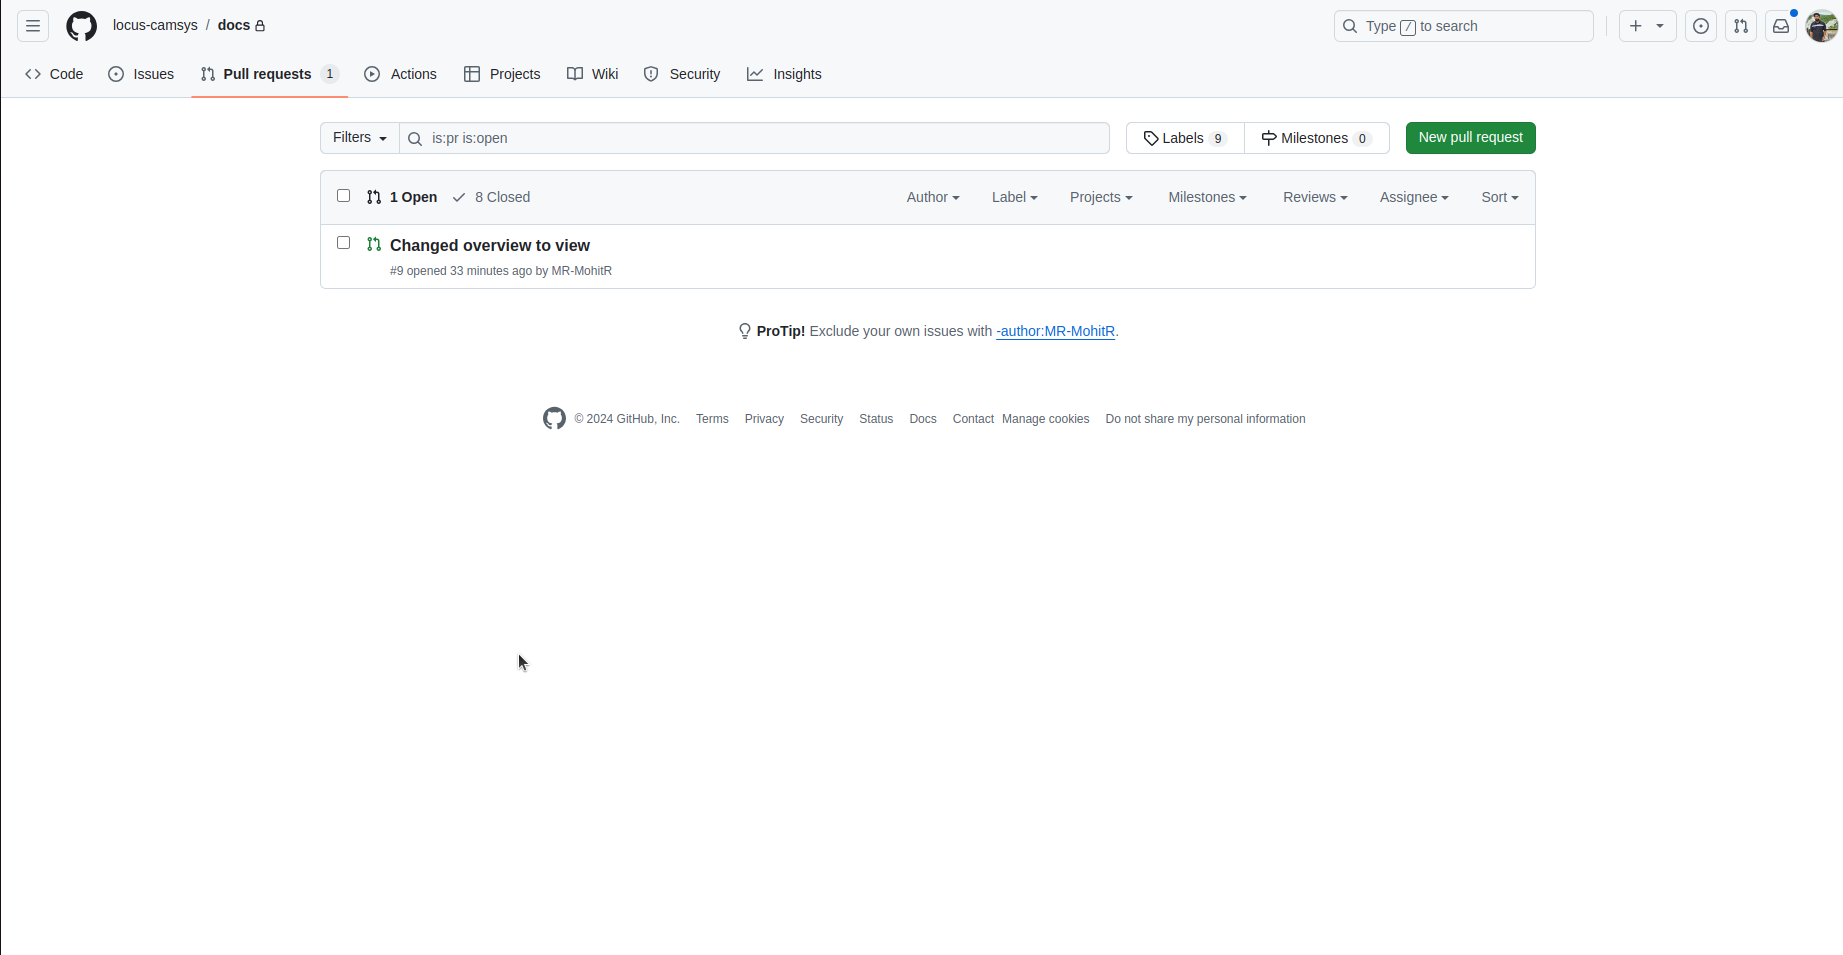
3. Review and Manage PRs:
- Click on any pull request to open it.
- Review the changes, provide feedback if needed, and approve or request modifications as necessary.
- Once a PR is approved, you can Merge it into the main branch by clicking Merge pull request.
4. Deploy Changes: After merging, changes will be automatically deployed. You can review the updates on the documentation site at Locus Portal Docs.
This process ensures that all updates are reviewed, approved, and seamlessly deployed to the live documentation site.
1.4.1 Merge the Pull Request
Once a pull request (PR) has been reviewed and approved, follow these steps to merge it into the main branch:
- Open the Approved Pull Request: Navigate to the approved PR and click on it to view details.
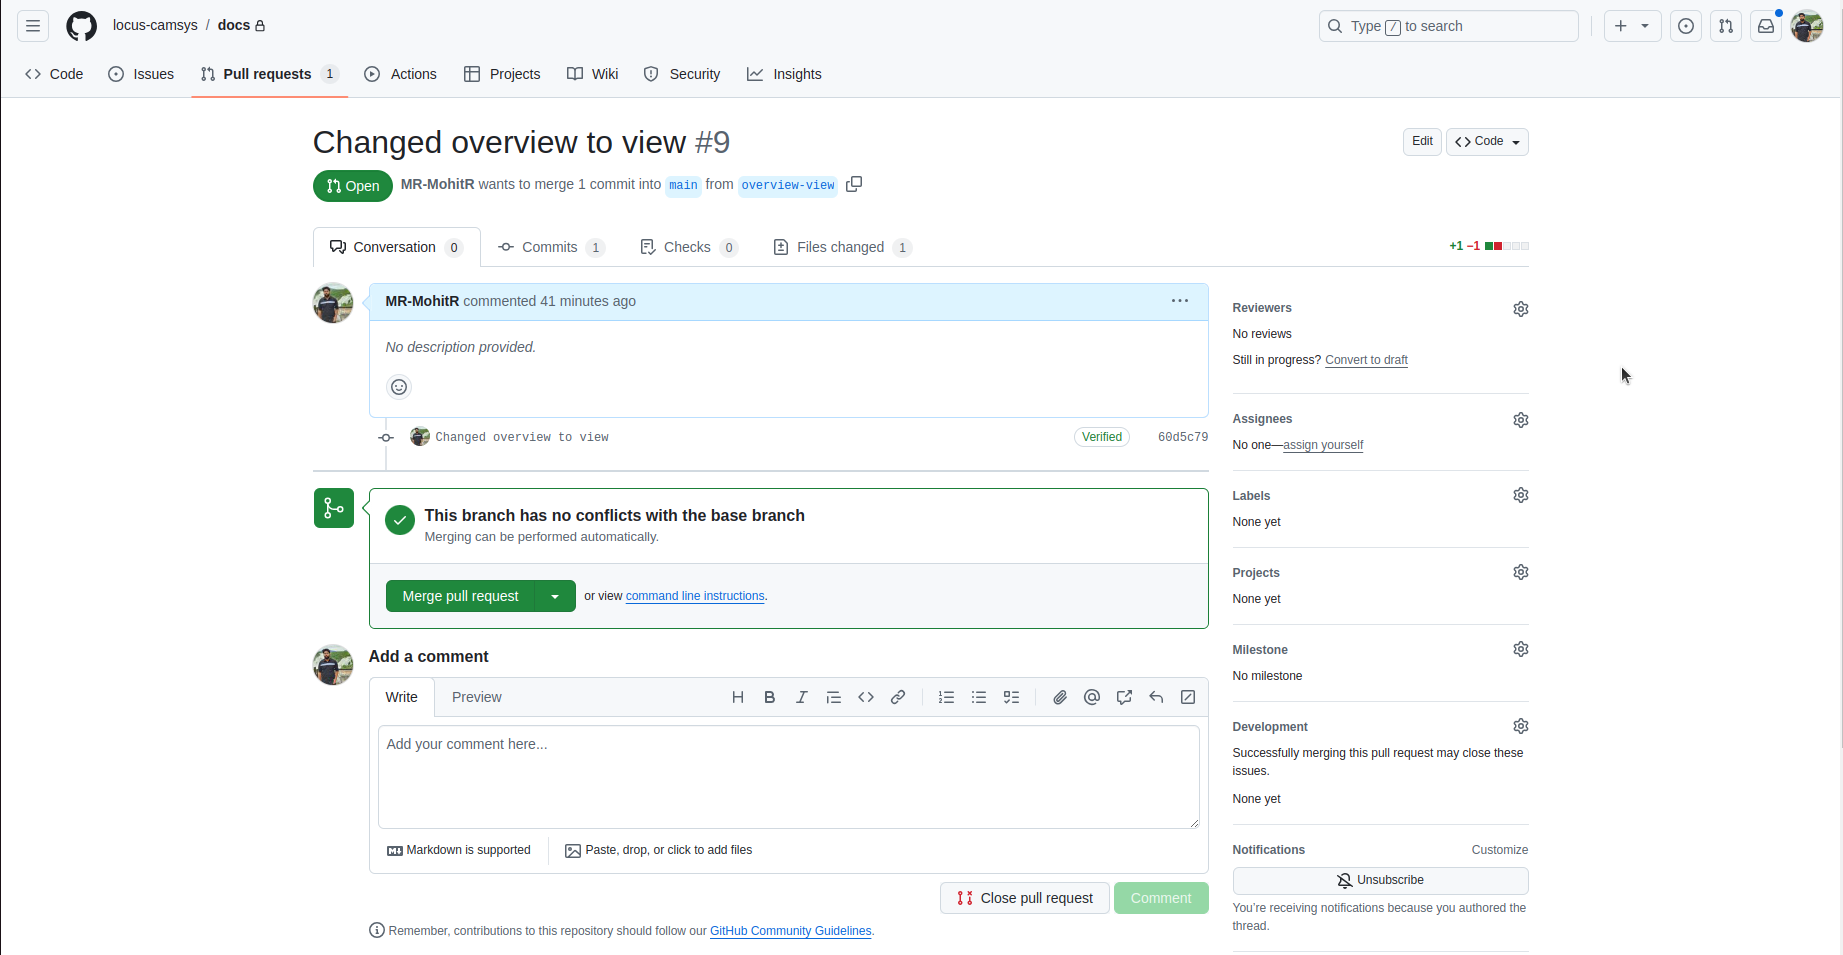
2. Merge the PR:
- Click the Merge pull request button.
- A confirmation prompt will appear. Click Confirm merge to finalize.
3. Deployment:
- Once merged, the changes will be automatically deployed.
- Verify the updates on the documentation site at Locus Portal Docs.
This completes the merge process, integrating the approved updates into the main documentation branch.
1.5 Adding Videos to Your Page
To embed videos in Markdown files:
-
Use HTML Syntax: Place the HTML
<video>element directly in your Markdown file. -
Note: Replace src(source) with the link of the video
Example:
<video controls>
  <source
    src="https://locus-private-documents.s3.amazonaws.com/LOCUS_User_Guide_Transit.mp4"
    type="video/mp4"
  >
</video>
This code will embed a playable video on the page.
1.6 Uploading Videos to an S3 Bucket
To upload a video to an Amazon S3 bucket, follow these steps. This guide assumes you have permissions to access and upload files to the S3 bucket.
Steps to Upload a Video File to S3
- Navigate to Your S3 Bucket: Open the Amazon S3 service from the AWS Management Console and select the target bucket (e.g., locus-private-documents).
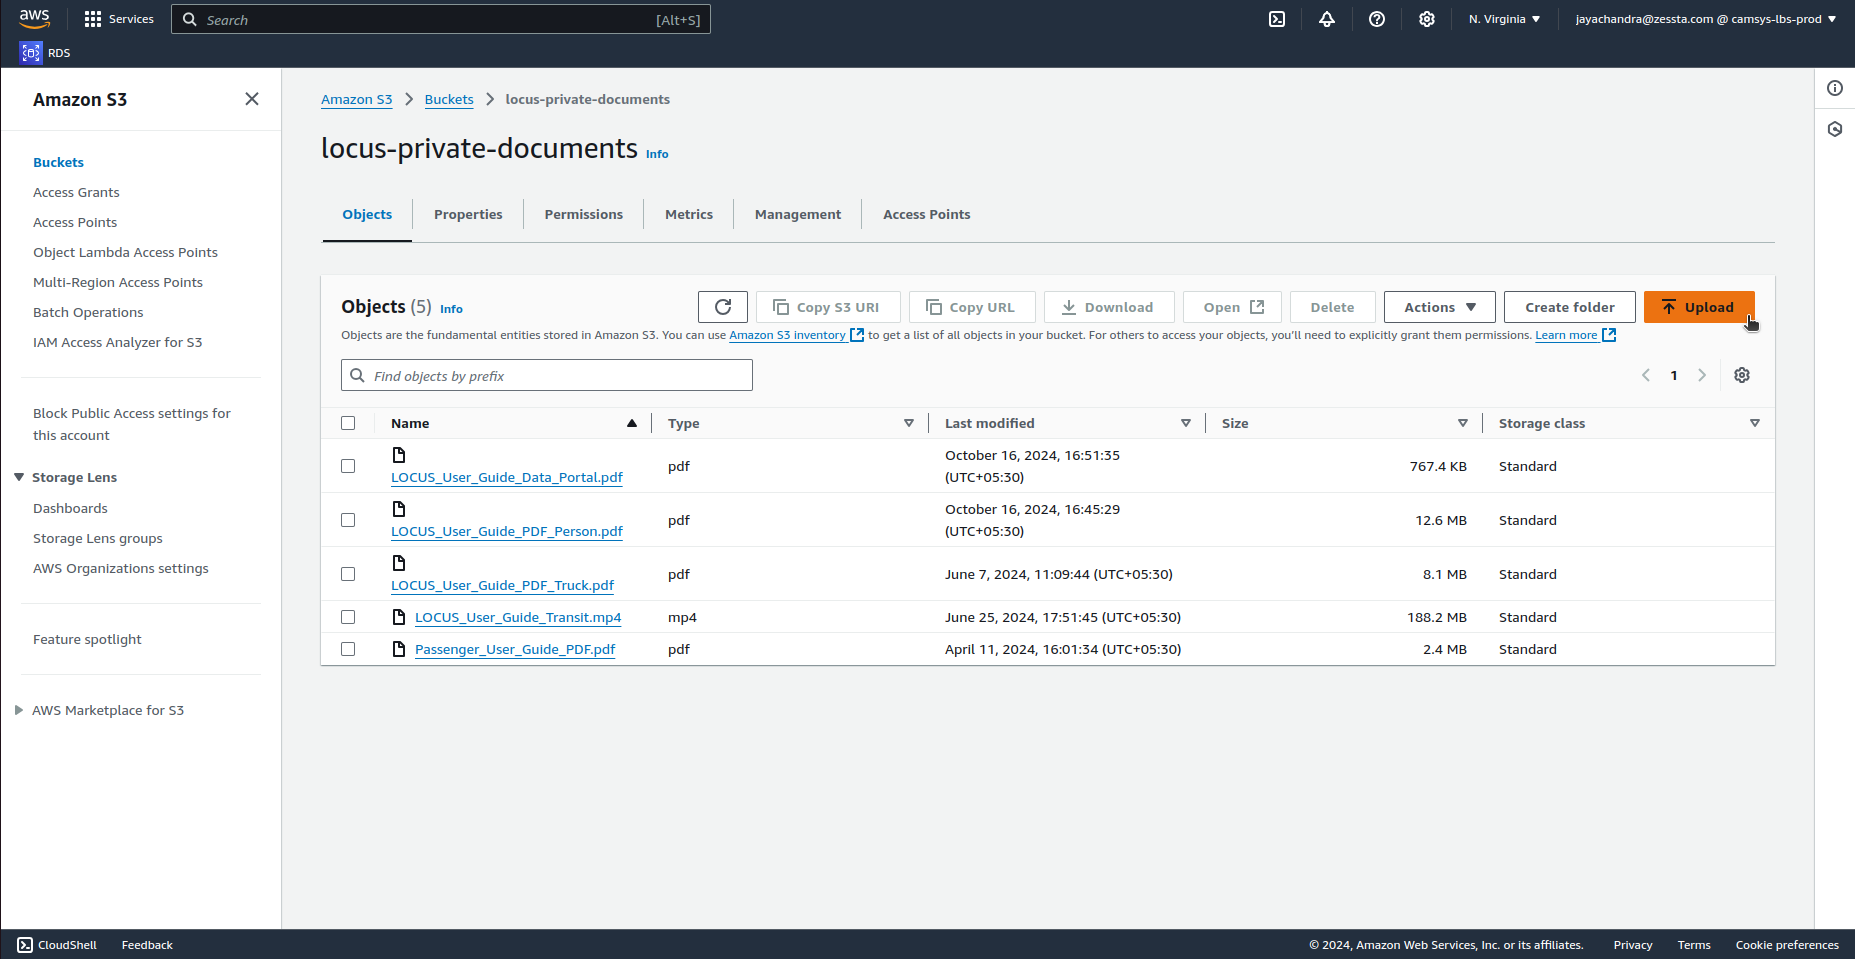
2. Initiate Upload: Click on the Upload button to start the upload process.
3. Add Your Video File:
- Click on Add files to open your file browser and select the video you want to upload.
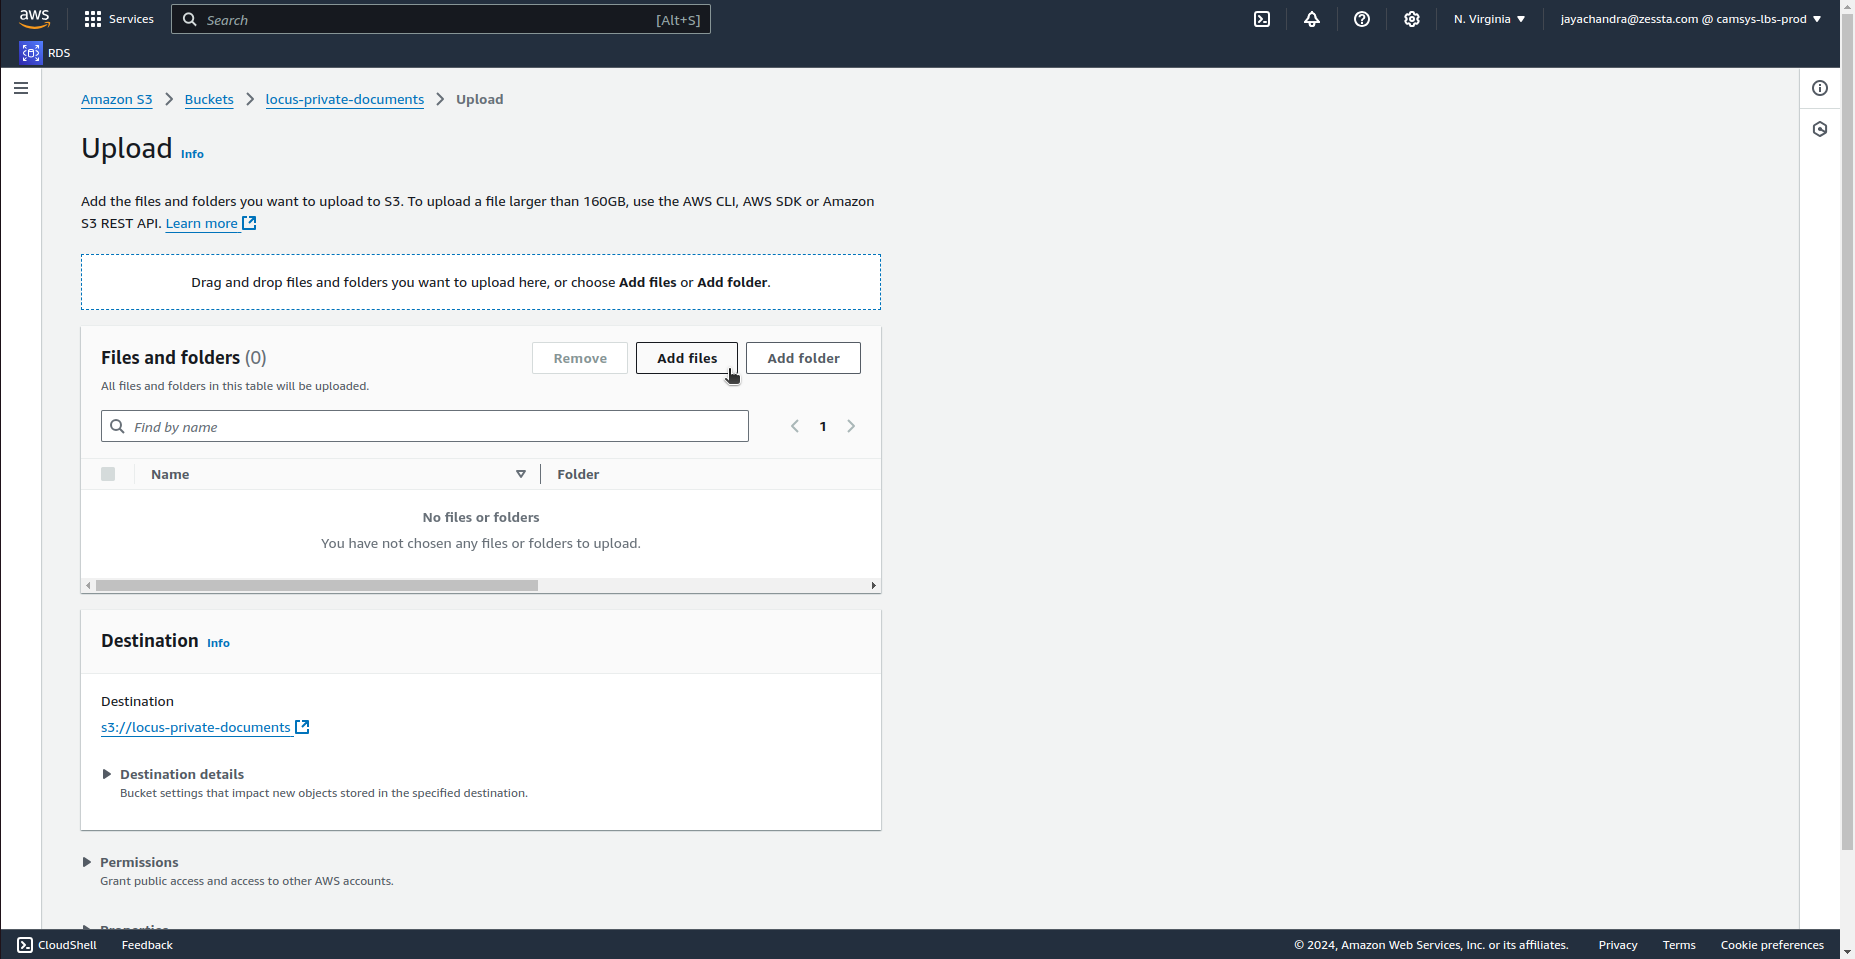
4. Review and Configure Settings:
- Permissions: Set the permissions based on who should have access to the video. For private documentation, ensure that Block Public Access is enabled.
5. Initiate Upload:
- Once the file is added and settings configured, click on the Upload button to finalize.
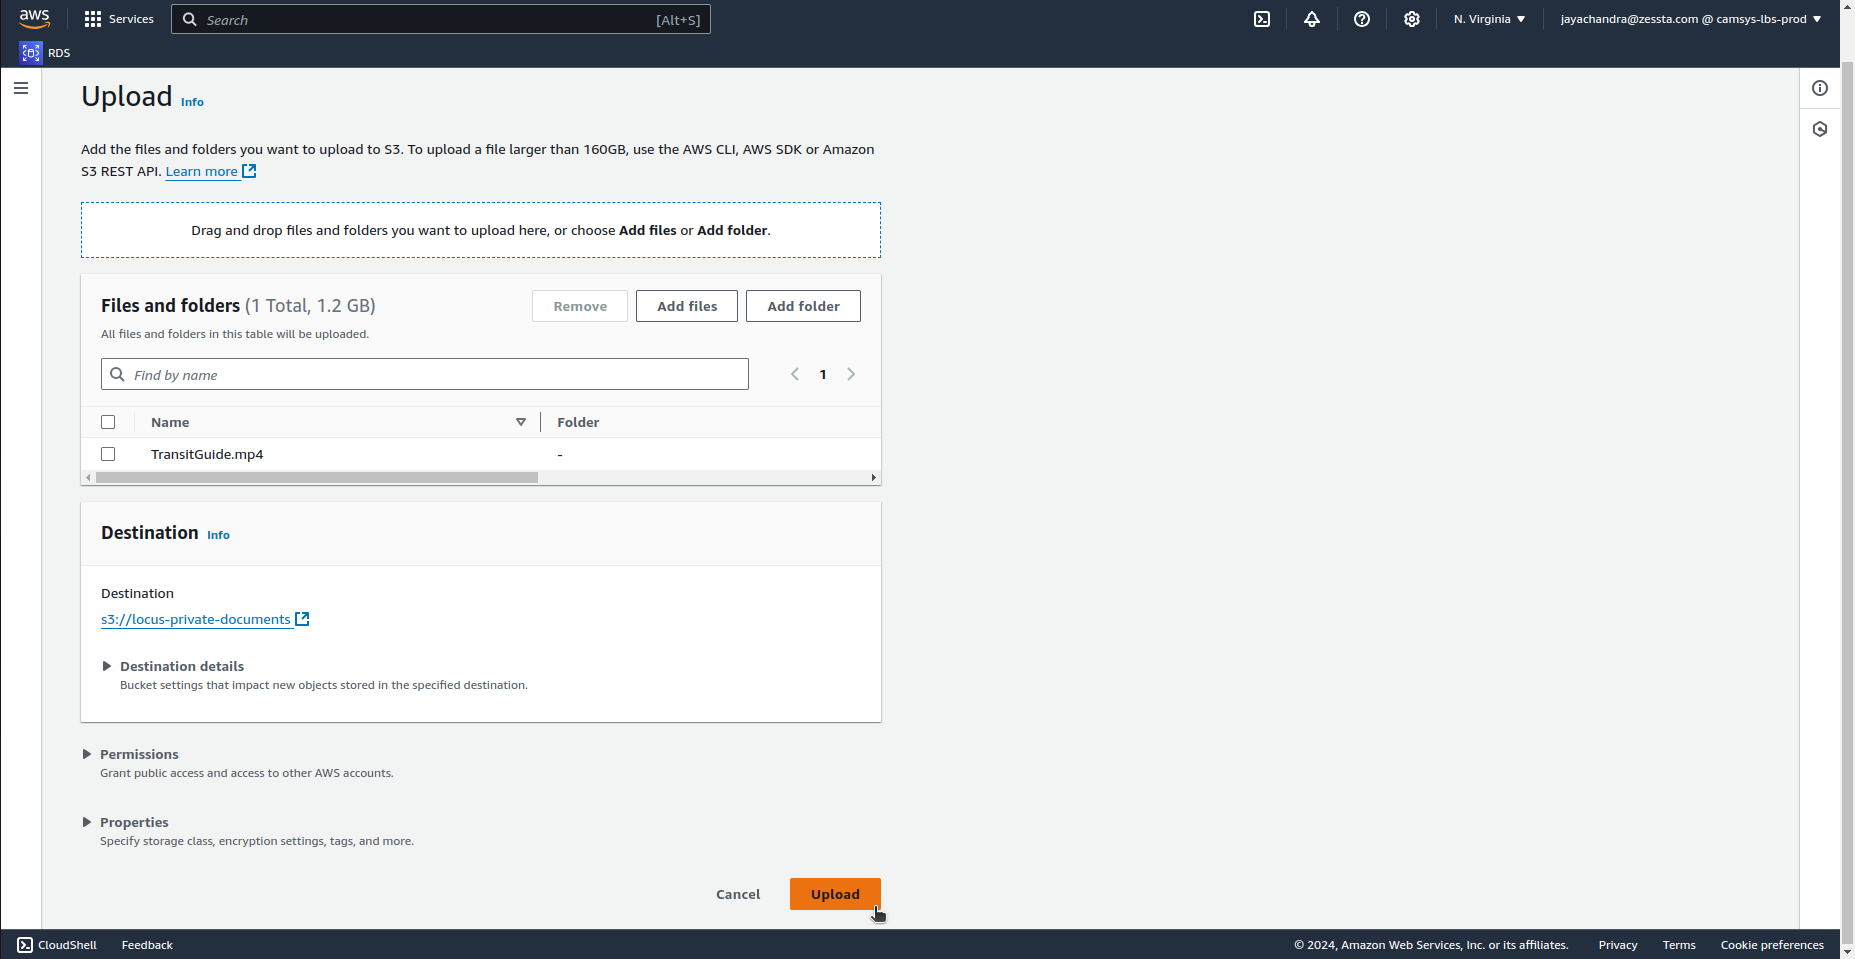
6. Confirm Upload:
- Once the upload completes, verify the file appears in the bucket and note the Object URL for use in your documentation. You can retrieve this URL from the file's details panel for embedding or linking directly to the video.
By following these steps, you can securely upload videos to an S3 bucket and retrieve the URL needed for embedding in your documentation.