Data Artifacts and Requests
Data Artifacts
Study Areas
A study area is a combination of one or multiple polygons within your licensed geographical area.
Navigation
i. View all study areas you have access to.
ii. Use the toggle to switch between all study areas, study areas created by you, and study areas shared with you.
iii. Use the "Create New Study Area" button to create a new study area
Create a New Study Area

Step 1: Name your study area
Step 2: Provide a short description for your study area
Step 3: Study area options include:
-
Selecting from one or multiple states and counties
-
Uploading a new study area through a Zip or GeoJSON file or by drawing a custom shape
Step 4: Save your new study area
Time of Day
A time of day is a partition of the 24 hour day into non-overlapping time-windows.
Navigation
i. View all time-of-day categories you have access to.
ii. Use the toggle to switch between all time of days, time of days created by you, and time of days shared with you.
iii. Use the "Create New Time of Day" button to create a new time-of-day category
Create a New Time of Day
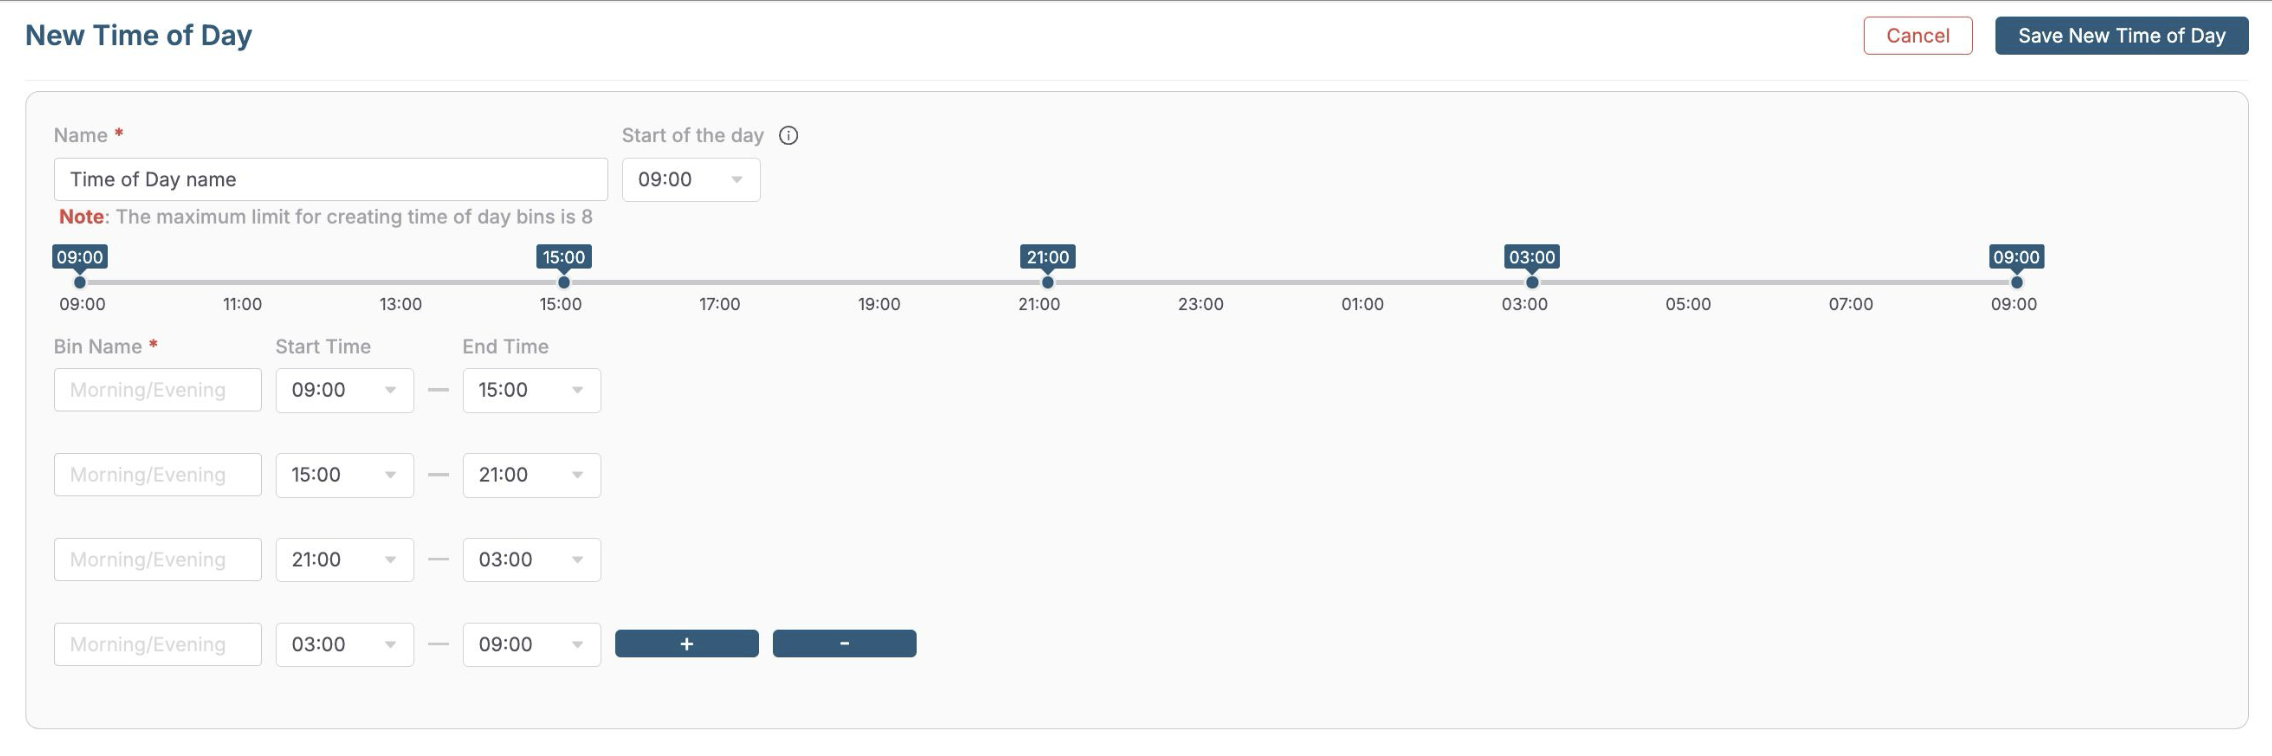
Step 1: Name your selection based on the attributes you have assigned to each interval.
Step 2: Select where your day should begin. Note that each day will start and end at the same time.
Step 3: Create as many discrete intervals as needed. Use the + and - buttons to create or delete a new time-of-day bin.
Zone Systems
A zone system is a partition of the study area into smaller non-overlapping polygons. Default zone systems are counties and block groups, and users can upload their own.
Navigation
i. View all zone systems you have access to.
ii. Use the "Create New Zone System" button to create a new zone system.
Create a New Zone System
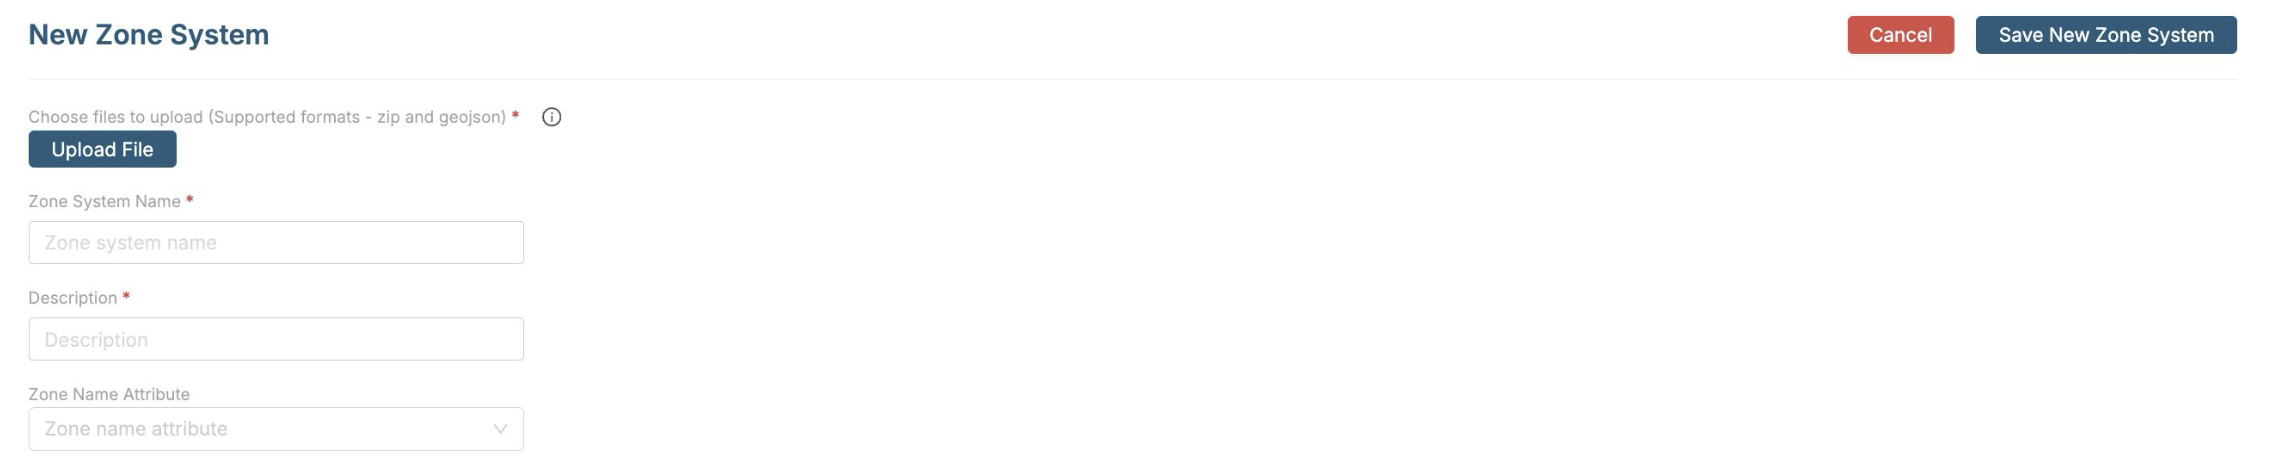
Step 1: Upload a .ZIP file with your desired zone system
Step 2: Assign a unique name for your zone system
Step 3: Input a brief description for your zone system
Map Layers
A map layer is a file to overlay on the map which can assist with certain analyses, including but not limited to transit stations, bus routes, building footprints, and more.
Navigation
i. View all map layers you have access to.
ii. Use the "Create New Map Layer" button to create a new map layer.
Create a New Map Layer
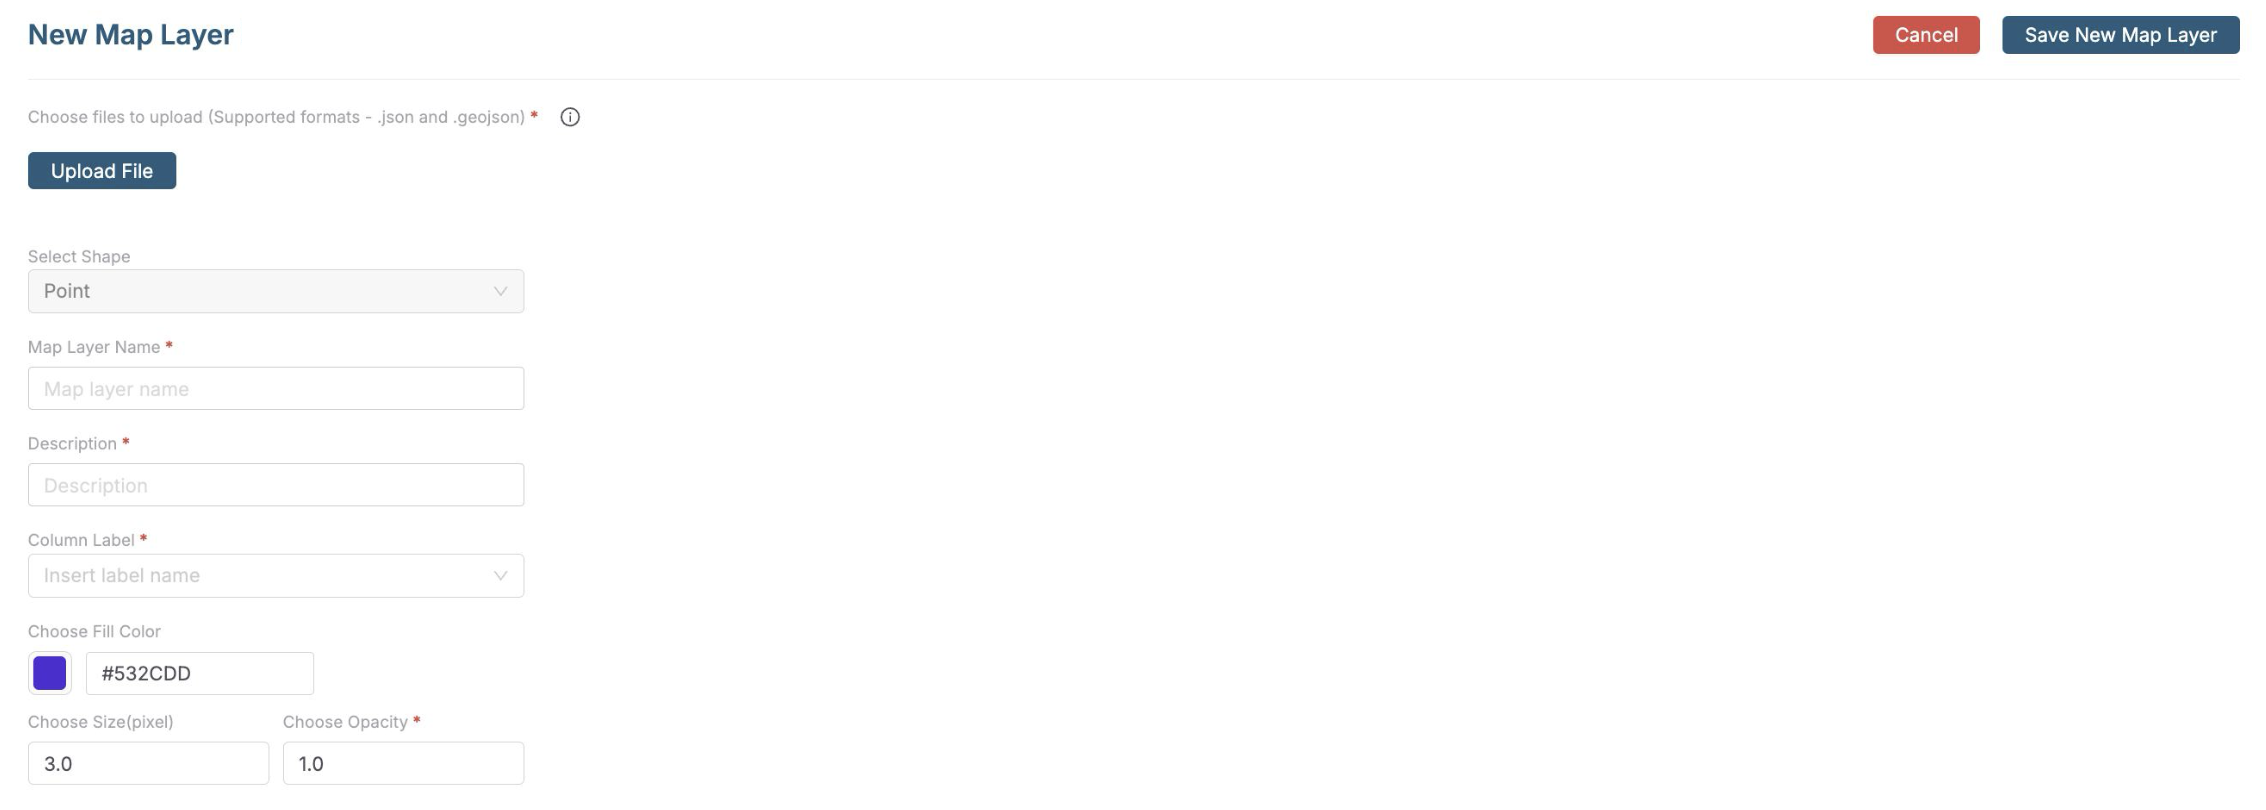
Step 1: Upload a .JSON file with your desired map layer
Step 2: Select shapes used in your map layer. Options include:
-
Point
-
Line
-
Polygon
Step 3: Input a unique name for your map layer
Step 4: Add a brief description for your map layer
Step 5: Create a column label for your map layer
Step 6: Assign design attributes to your map layer. These vary based on the shape you previously selected for your new map layer. Options include:
-
Point: fill color, size in pixels, and opacity.
-
Line: color, size in pixels, opacity
-
Polygon: fill color, outline color, opacity
Community Type
Community type refers to a table that associates each block group within an area to an community type categorical value.
Navigation
i. View all community types you have access to.
ii. Use the "Create New Community Type" button to create a new community type.
Create a New Community Type
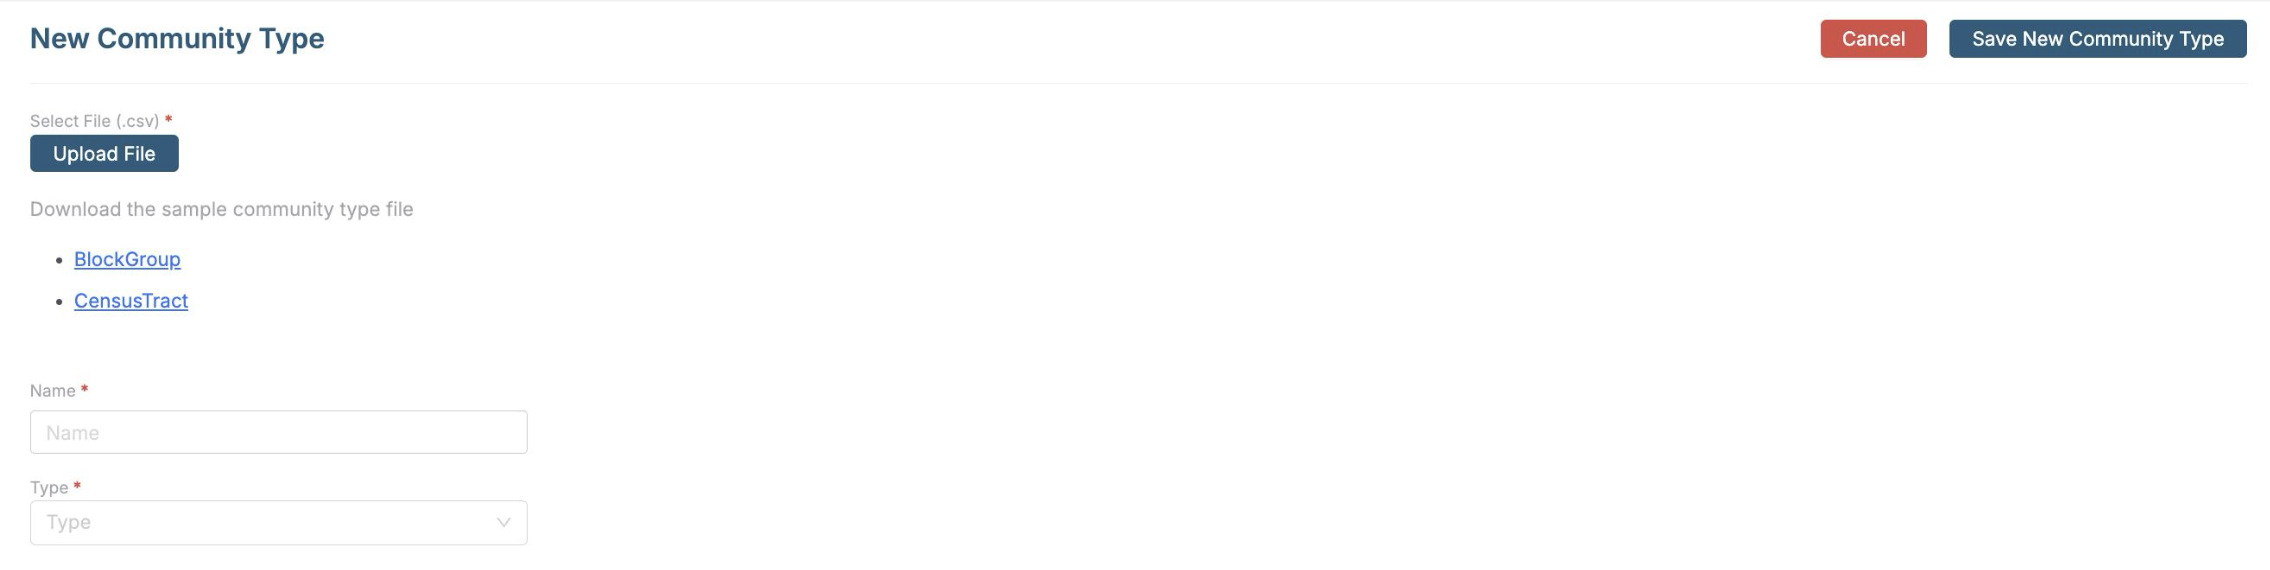
Step 1: Upload a .CSV file with the community type file you would like to use
Step 2: Assign a unique name for your community type
Data Requests
All data requests made through the product dashboards will be visible here. View pending, approved, and declined data requests.